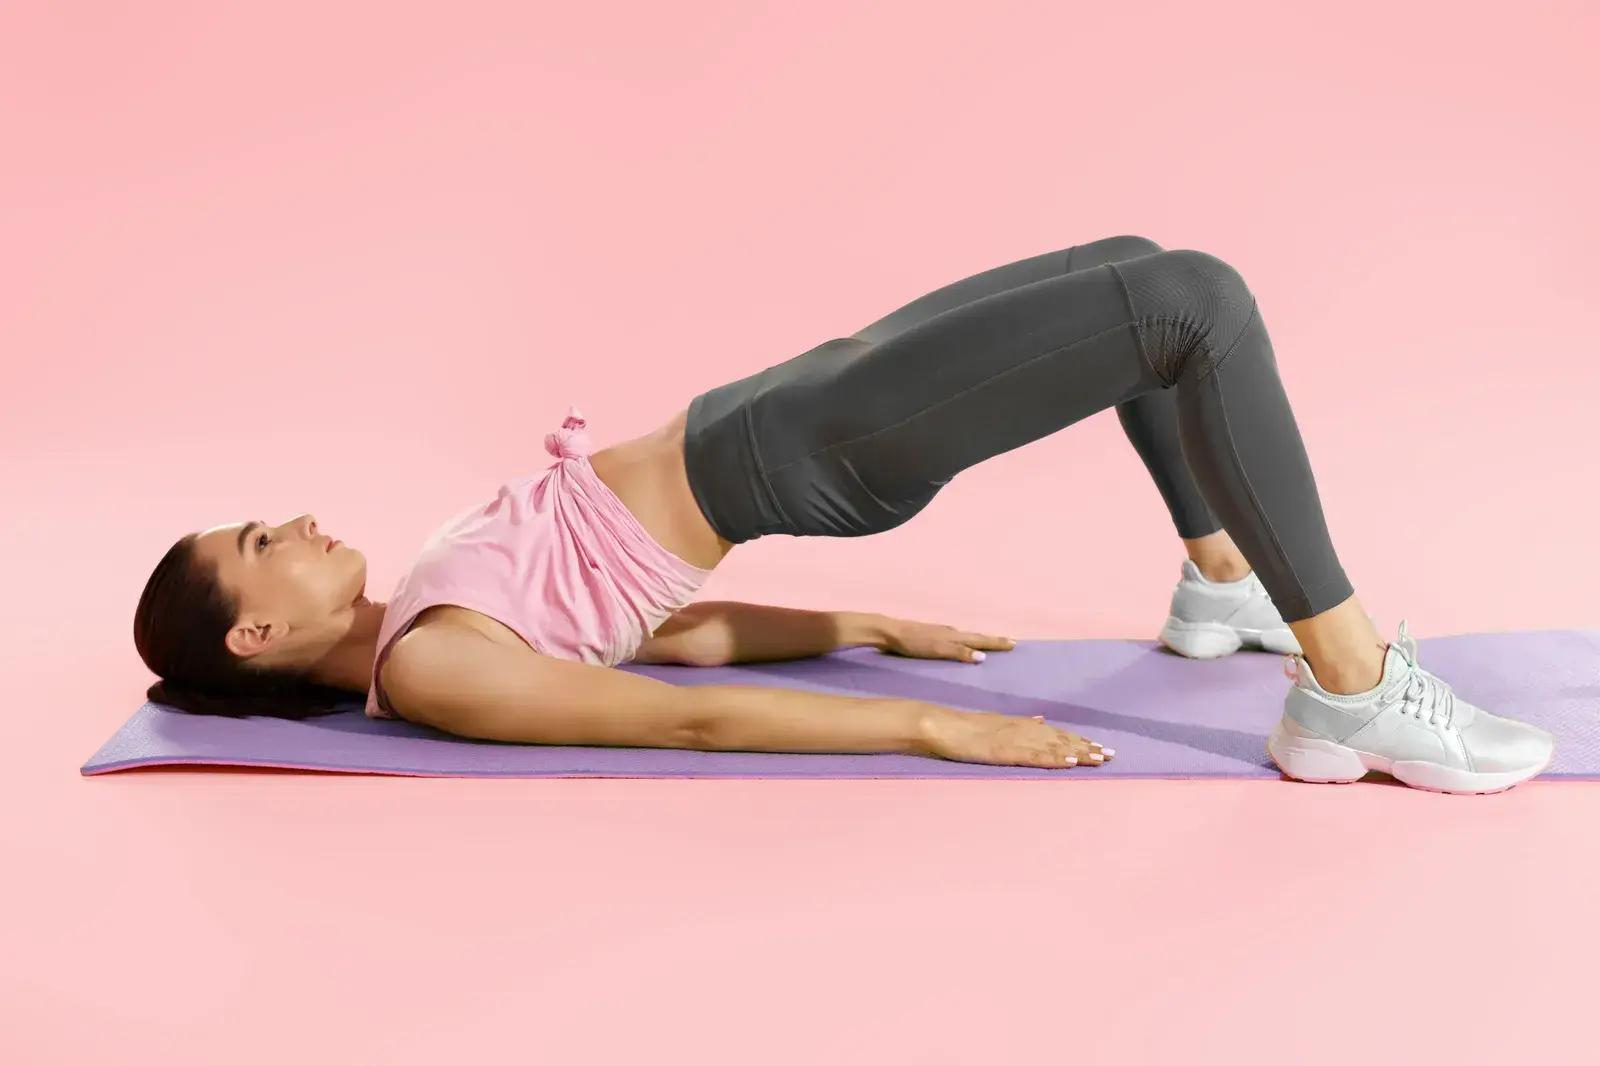
A glute bridge is done lying on your back with knees bent and feet flat: you press through your feet and lift the hips until the body forms a straight line from shoulders to knees, then lower slowly. It strengthens the glutes and, depending on foot position, the hamstrings, so physical therapists use it for low back pain, hip pain and the middle stages of hamstring strain rehab. Read it as general education; a therapist who examines you decides whether it fits and what dose suits you.
Last updated By the Monon Therapy Collective editorial team
- Main muscles
- Gluteus maximus, with the hamstrings
- Top position
- A straight line from shoulders to knees
- Feet
- About hip-width, heels a hand’s length from the seat
- Often used for
- Low back pain, hip pain, hamstring strain
What does a glute bridge strengthen, and why does it matter after sitting all day?
The glute bridge strengthens the gluteus maximus, the large muscle that straightens the hip when you stand up, climb stairs or push off in running. When that muscle is weak or slow to switch on, the low back and hamstrings often pick up extra work, which is one reason the bridge appears in so many back and hip plans.
Long days at a desk and long drives on Keystone Parkway or I-465 keep the hips bent for hours. The bridge reverses that position under light load, and many desk workers are given it alongside a plan for more frequent breaks. If sitting itself is painful, the page on lower back pain when sitting covers likely causes.
Why do my hamstrings cramp in a glute bridge, and how do I fix it?
Hamstring cramps usually mean the feet are too far from your seat or the glutes are not doing their share. Moving the heels closer to the body shortens the lever for the hamstrings, and squeezing the glutes before you lift tells them to lead.
Pressing through the whole foot instead of only the heels also helps, as does lowering the hips a little at the top. If cramps persist, tell your therapist: a hamstring that cramps easily may be weaker than it looks.
How is the bridge used after a hamstring strain?
After a hamstring strain, therapists often use bridge variations to load the healing muscle in stages. Early on that may be a gentle hold with the feet close, and later the feet move farther away so the hamstrings work at a longer length.
The long-lever bridge, with the heels well away from the seat or resting on a bench, is a common middle step before harder exercises such as the Nordic hamstring curl. The pace depends on how bad the strain was and how the leg responds, which is why the timing comes from your therapist, not a calendar. You can request a match through the physical therapy questionnaire.
Glute bridge errors: arching, knees falling in, rushing
The error that matters most is lifting the hips by arching the low back, which loads the spine instead of the hips. A straight line from shoulders to knees is the target, not the highest possible hips.
- Arching the low back at the top instead of finishing with the glutes.
- Letting the knees fall inward or flop outward as the hips rise.
- Dropping the hips quickly instead of lowering under control.
From two-leg bridge to hip thrust: the usual progressions
Progression usually runs from two legs to one leg, then from body weight to added load with the shoulders on a bench. A bench and dumbbells, like those in the private suites at Carmel City Center, are all a loaded version needs.
- Easier: a smaller lift, or a hold at the top with both feet down.
- Bridge with a light loop band above the knees, pressing gently outward.
- Marching bridge: hold the top and lift one foot, then the other.
- Single-leg bridge with the other knee hugged to the chest.
- Long-lever bridge with the heels on a bench for the hamstrings.
- Hip thrust: shoulders on a bench, a weight across the hips.
Glute bridge, step by step
Set the feet carefully; their position changes which muscle works hardest.
Lie down and place the feet
Lie on your back with knees bent and feet flat, about hip-width apart, heels roughly a hand’s length from your seat. Rest your arms by your sides, palms down.
Set the pelvis
Breathe out and let the lower ribs settle, tilting the pelvis just enough that the low back is not arched. This stops the lift coming from the spine.
Drive the hips up
Press evenly through the whole foot, heels included, and lift the hips until shoulders, hips and knees form a straight line. Keep the knees pointing the same way as the toes.
Hold the top briefly
Pause for a second or two with the glutes working, without pushing the hips higher by arching the back.
Lower under control
Take two to three seconds to lower the hips back to the mat. Rest a moment and repeat; your therapist sets the number of repetitions and sets.
Stop bridging and get checked if...
- You feel a sudden sharp pain or pop in the back of the thigh.
- Pain runs down the leg below the knee, or the leg feels weak or numb.
- Pain at the front of the hip is deep and sharp, or the hip catches and locks.
- Back pain is getting worse each day despite rest, or comes with fever.
- There is new bruising in the back of the thigh after an exercise.
If you think it is an emergency, call 911.